There is considerable disagreement among historians as to exactly where the events in and around Charlot’s Farm took place.
In his book, The Last Hurrah, Kyle Sinisi argues this engagement took place in Kansas, about one mile west of the Missouri/Kansas state line [Waypoint = 37.858856 -94.644612]. Sinisi’s map indicates Price’s wagon train crossed the Marmaton River just south of the battlefield.
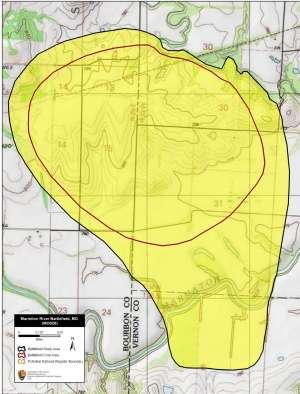
The National Park Service places the location of this battlefield astride the Missouri/Kansas state line, west of Shiloh Creek [Waypoint = 37.872054 -94.615857]. Although not explicitly depicted, their map suggests the wagon train crossed just south of the battlefield.
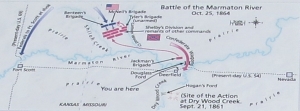
The Missouri Department of Natural Resources recently placed an interpretive sign for the Battle of the Marmaton River along US Highway 54 near Deerfield, Missouri. This interpretive sign places the location of the battle in Missouri, east of Shiloh Creek, west of Cottonwood Creek and north of the Marmaton River [Waypoint = 37.876597 -94.581573]. The map indicates Price’s wagon train crossed the Marmaton River using Douglas Ford, just west of where Drywood Creek flows into the Marmaton.
In the Battlefield Atlas of Price’s Missouri Expedition of 1864, Charles D. Collins, Jr. agrees with the Missouri Department of Natural Resources analysis. Collins’s map indicates the battle took place in Missouri with Price’s wagon train using Douglas Ford to cross the Marmaton River.
On this tour, you will drive through all of these areas before ending at the Missouri Department of Natural Resources interpretive sign [Waypoint = 37.840750 -94.500850].
Map of Marmaton River Battlefield (National Park Service)
Map of Marmaton Battlefield (Missouri Department of Natural Resources)
Please be aware some of these roads are in poor shape and may not be passable following heavy rains (just like in 1864).
From Fort Scott National Historic Site, return to US Highway 54 and head east. About 3.5 miles east of US Highway 69, turn left (north) on 225th Street. You will cross the Marmaton River near where Sinisi believes Price’s army crossed. As you continue driving north, turn right (east) on Native Road. This is the general location where Sinisi believes the Battle of Charlot's Farm took place.
Drive east on Native Road and turn left (north) on 267th Street. Now you are driving through the area identified as the Charlot’s Farm Battlefield by the National Park Service.
Continue north and turn right (east) on E Militia Road. Continue east and turn right (north) on S 200 Road. Continue north and turn right (east) on E Logan Road. Continue east and turn right (south) on S 300 road. Now you are in the general location for the battle as determined by the Missouri Department of Natural Resources.
Continue south and turn left (east) on US Highway 54. In 4.5 miles, turn into the truck stop on the right (south) side of the highway. There is an interpretive sign near the highway just east of the paved parking lot.
Battles in the Marmaton Valley Interpretive Sign
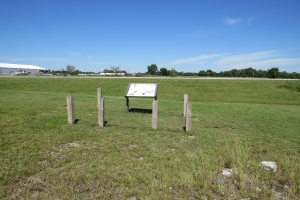
Battles in the Marmaton Valley Interpretive Sign Inscription
The Battle of the Marmaton River (Charlot's Farm)
October 25, 1864
In the fall of 1864, Maj. Gen. Sterling Price led 12,000 Confederate cavalry on an ill-fated raid through Missouri. He was defeated at Westport on Oct. 23, then pursued south by Federal cavalry. The demoralized Confederates were hindered by a train of approximately 500 wagons, loaded with captured supplies. Disaster struck again on Oct. 25. Nearly half of Price's army was routed while protecting the wagons as they crossed Mine Creek in Kansas. The fugitives and wagons were pursued throughout the afternoon, their trail marked by discarded weapons, abandoned horses, and burning farms. Late in the afternoon, the wagons reached the Marmaton River at Douglass Ford, a mile northeast of Deerfield, Mo., the only place where wagons could cross. To save his train, Price ordered Brig. Gen. Joseph O. Shelby to slow the pursuers.
Shelby commanded Price's only intact division. He selected a position on a low prairie hill between Shiloh and Cottonwood Creeks six miles northwest of Douglass Ford and deployed his best troops behind fences and stone walls. They were supported by units that had been rallied after the defeat at Mine Creek. In the woods on his right, he concealed the unarmed but enthusiastic recruits of Col. Charles Tyler's brigade. In all, Shelby had about 8,000 men, although most were demoralized and unreliable.
At 3:30 p.m. the Federals came in sight. Brig. Gen. John McNeil's brigade led, followed by Lt. Col. Frederick Benteen's brigade; the other Federal brigades trailed miles behind. McNeil's weary brigade, which numbered about 1,000, deployed 800 yards from the enemy. Although outnumbered and outflanked, they were flushed with victory; the Confederates were near collapse, so McNeil ordered an immediate attack.
The sight of the grimly advancing Federals threw the Confederates into disorder. To gain time to rally his line, Shelby ordered Tyler's unarmed men to charge, which forced McNeil to halt. Shelby counterattacked, but was driven back by shell and canister fire from two 12-pounder mountain howitzers and two 3-inch rifled guns, which had reinforced McNeil.
Benteen's brigade came up on McNeil's right. They advanced together, but were forced to halt when Benteen's men came under friendly artillery fire. When the advance resumed, the horses, exhausted from days of marching and fighting, would not charge, so the Federals halted 300 yards from the enemy and opened fire. The 4th Iowa Cavalry saw the Southerners wavering, and advanced. As Shelby's left began to disintegrate, Col. Sidney Jackman's brigade arrived from reserve and drove the Iowans back.
Darkness fell and the firing ceased; the Confederates retreated to the river. They had lost 25 killed and about 50 wounded, mostly from artillery fire; the Federals suffered far less. McNeil requested reinforcements, but the other brigades had been diverted to Fort Scott, six miles southwest, to rest and resupply. He and Benteen were left facing the enemy, without rations or fodder.
The Southerners forded the Marmaton at a half-dozen places and dropped down exhausted along Dry Wood Creek. The wagon train did not finish crossing until midnight, it had almost cost Price his army, so he ordered the greater part burned. He resumed his retreat at 2 a.m., but all organization had been lost; only some elements of Shelby's division stayed in ranks. For miles the prairie was strewn with discarded weapons and broken-down livestock. Price pushed his men 56 miles to Carthage, where they rested and reorganized before retreating south. The Federals at Fort Scott were too far away to intervene, and did not regain contact for several days. Shelby’s stand on the Marmaton had allowed the Confederates to escape The Union’s opportunity to destroy Price’s army had been lost, but the beaten and demoralized Southerners no longer posed a threat.
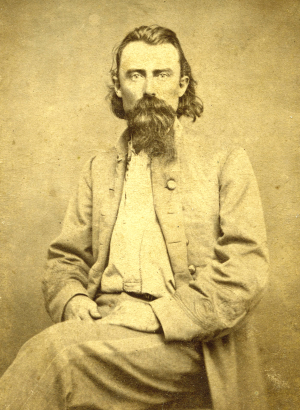
Brig. Gen. Jo Shelby
Brig. Gen. John McNeil
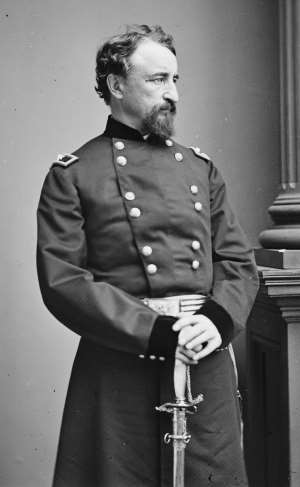
Lt. Col. Frederick W. Benteen
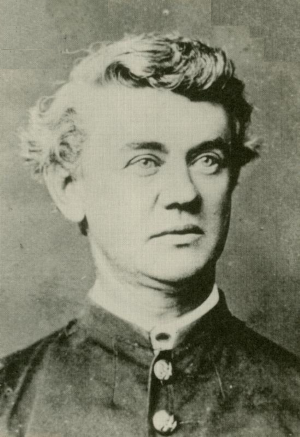
The next tour stop is located in Newtonia, Missouri about 90 miles away.